Connect Porta with a .NET Core Application
An overview on how to connect Porta to a .NET Core Application.
Register Application
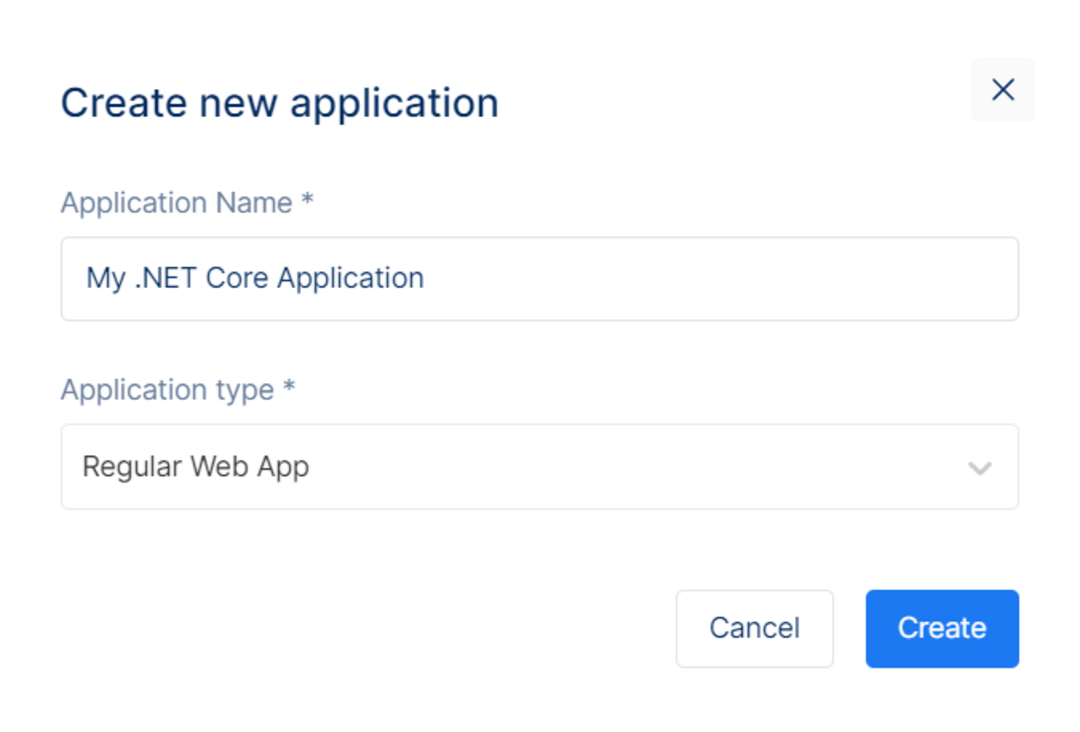
In the Administrator Panel, navigate to Client and choose Create new application. Fill in the Application name and select application type from the dropdown list. Click Create to complete the application initial information.

Configure Client Secret
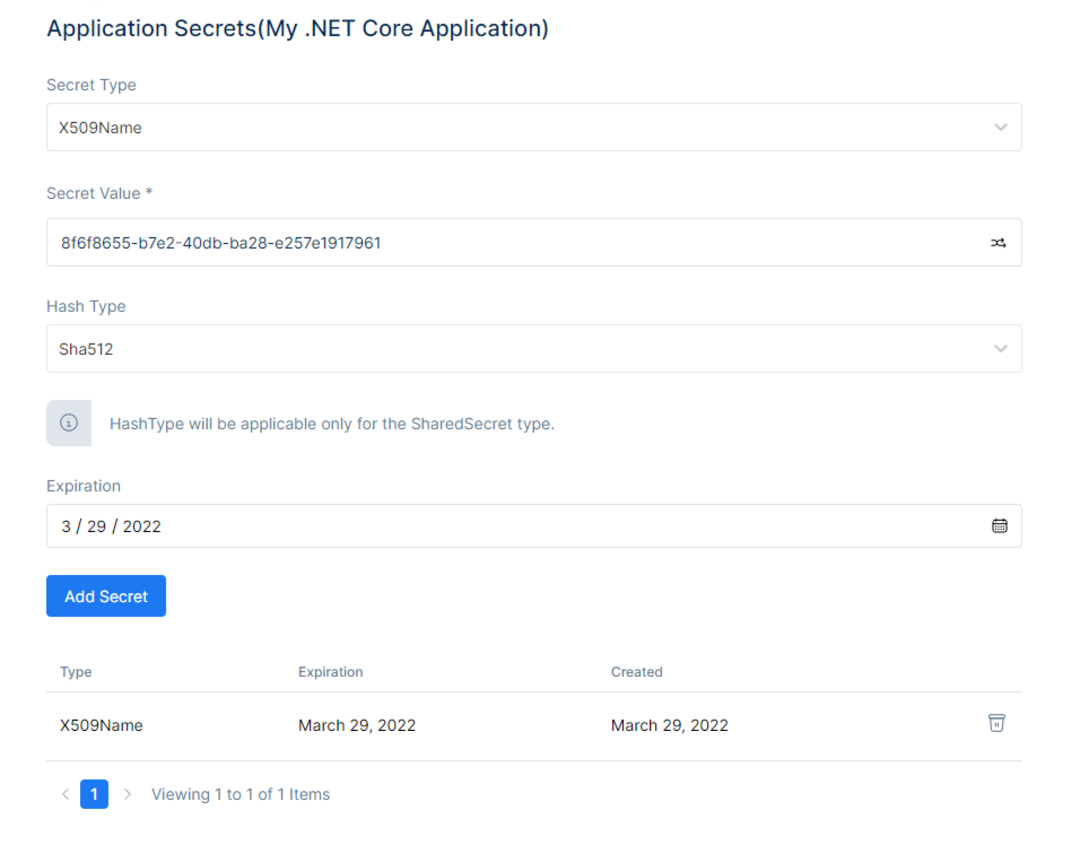
Enabling Client Secret is required for the application. Choose Manage Client Secrets and fill in the information. Choose secret type from dropdown list, enter secret value in the dialog, and choose hash type. Select calendar dates under expiration (secret key expiration date). A secret value is generated after completing the steps.

Configure Callback URLs
A callback URL is a URL in your application where Porta redirects the user after they have authenticated. Enter Callback URLs in the Application URLs dialog in the Application Settings. If this field is not set, users will be unable to log in to the application and will get an error.
Configure Logout URLs
A logout URL is a URL in your application that Porta can return to after the user has been logged out of the authorization server. This is specified in the returnTo query parameter. The logout URL for your app must be added to the Allowed Logout URLs field in your Application Settings. If this field is not set, users will be unable to log out from the application and will get an error.
Configure Scopes
An Application must have at least one scope and OIDC requires an 'openid' scope. Navigate to the Advanced Settings to Add Scopes and to Manage Settings.

Configure Your Application to Use Porta
Install dependencies
To integrate Porta with ASP.NET Core, use the Cookie and OpenID Connect (OIDC) authentication handlers. Ensure that you add the Microsoft.AspNetCore.Authentication.OpenIdConnect package to your application.
Install-Package Microsoft.AspNetCore.Authentication.OpenIdConnect
Install and configure OpenID Connect middleware
To enable authentication in your ASP.NET Core application, use the OpenID Connect (OIDC) middleware and navigate to the ConfigureServices method of your Startup class. To add the authentication services, call the AddAuthentication method and to enable cookie authentication, call the AddCookie method. Configure the OIDC authentication handler and add a call to AddOpenIdConnect. Pass Porta as the authenticationScheme parameter, which is used to challenge the OIDC middleware. Configure other parameters, such as ClientId, ClientSecret and ResponseType. The OIDC middleware requests both the openid and profile scopes. Therefore, a large ID Token is returned. We suggest that you request only the necessary scopes you need.
  // Startup.cs

public void ConfigureServices(IServiceCollection services) {
// Add authentication services
 services.AddAuthentication(options => {
 options.DefaultAuthenticateScheme = CookieAuthenticationDefaults.AuthenticationScheme;
 options.DefaultSignInScheme = CookieAuthenticationDefaults.AuthenticationScheme;
 options.DefaultChallengeScheme = CookieAuthenticationDefaults.AuthenticationScheme;
})
 .AddCookie()"
 .AddOpenIdConnect("Porta", options => {
 // Set the authority to your Porta domain
 options.Authority = $"https://{Configuration["Porta:Domain"]}";

 // Configure the Porta Client ID and Client Secret
 options.ClientId = Configuration["Porta:ClientId"];
 options.ClientSecret = Configuration["Porta:ClientSecret"];

 // Set response type to code
 options.ResponseType = OpenIdConnectResponseType.Code;

 // Configure the scope
 options.Scope.Clear();
 options.Scope.Add("openid");

// Set the callback path, so Porta will call back to http://localhost:3000/callback
// Also ensure that you have added the URL as an Allowed Callback URL in your Porta Application Settings
options.CallbackPath = new PathString("/callback");
 });

// Add framework services.
 services.AddControllersWithViews();
 }
Add the authentication middleware in the Configure method of the Startup class, call the UseAuthentication and UseAuthorization methods.
  // Startup.cs

publicvoidConfigure(IApplicationBuilder app, IHostingEnvironment env) {
if (env.IsDevelopment()) {
 app.UseDeveloperExceptionPage();
}
else {
 app.UseExceptionHandler("/Home/Error");
 // The default HSTS value is 30 days. You may want to change this for production scenarios, see   https://aka.ms/aspnetcore-hsts.
 app.UseHsts();
}
app.UseStaticFiles();
app.UseCookiePolicy();

app.UseRouting();

app.UseAuthentication(); // Add Authentication
app.UseAuthorization(); // Add Authorization

app.UseEndpoints(endpoints => {
endpoints.MapControllerRoute(
name: "default",
pattern: "{controller=Home}/{action=Index}/{id?}");
 });
}
Trigger Authentication
Add the Login and Logout methods
In the AccountController add Login and Logout actions, call ChallengeAsync and pass Porta as the authentication scheme. This invokes the OIDC authentication handler you registered in the ConfigureServices method.
After the OIDC middleware signs the user in, the user is also automatically logged in to the cookie middleware. This allows the user to be authenticated on subsequent requests.
For the Logout action, sign out the user of both middlewares.
The RedirectUri passed in both instances indicates where the user is redirected after successful login or failure to login.
  // Controllers/AccountController.cs

using Microsoft.AspNetCore.Authentication;
using Microsoft.AspNetCore.Authentication.Cookies;

publicclassAccountController : Controller {
publicasync Task Login(string returnUrl = "/") {
await HttpContext.ChallengeAsync("Porta", new AuthenticationProperties() { RedirectUri = returnUrl });
}

[Authorize]
publicasync Task Logout() {
 await HttpContext.SignOutAsync("Porta", new AuthenticationProperties {
 // Indicate here where Porta should redirect the user after a logout.
 // Note that the resulting absolute Uri must be added to the
 // \*\*Allowed Logout URLs\*\* settings for the app.
 RedirectUri = Url.Action("Index", "Home")
});
await HttpContext.SignOutAsync(CookieAuthenticationDefaults.AuthenticationScheme);
 } }
ASP.NET Core starts a call to SignOutAsync for the Porta authentication scheme. To log out the user from Porta, provide the OIDC middleware with the URL. To set the URL, handle the OnRedirectToIdentityProviderForSignOut event when registering for the OIDC authentication handler. To ensure that the user is logged out of Porta, the application calls SignOutAsync for the OIDC middleware and calls the /v2/logout endpoint of the Porta Authentication API. Specify the returnTo parameter, to redirect users after logging out. Specify the URL to redirect users in the Allowed Logout URLs field in the Application Settings. In the Startup.cs file, update the call to AddOpenIdConnect with the following code:
  // Startup.cs

public void ConfigureServices(IServiceCollection services) {
// Some code omitted for brevity...

// Add authentication services
 services.AddAuthentication(options => {
//...
 })
 .AddCookie()
 .AddOpenIdConnect("Porta", options => {
// ...

 options.Events = new OpenIdConnectEvents {
// handle the logout redirection
 OnRedirectToIdentityProviderForSignOut = (context) => {
 var logoutUri = $"https://{Configuration["Porta:Domain"]}/v2/logout?client\_id= {Configuration["Porta:ClientId"]}";

 var postLogoutUri = context.Properties.RedirectUri;
 if (!string.IsNullOrEmpty(postLogoutUri)) {
 if (postLogoutUri.StartsWith("/")) {
 // transform to absolute
  var request = context.Request;
  postLogoutUri = request.Scheme + "://" + request.Host + request.PathBase +   postLogoutUri;
 }
  logoutUri += $"&returnTo={ Uri.EscapeDataString(postLogoutUri)}";
 }

 context.Response.Redirect(logoutUri);
 context.HandleResponse();

 return Task.CompletedTask;
 }};
 });
 }
Add the Login and Logout buttons
In the navigation bar, add the Login and Logout buttons. In the navigation bar section in the /Views/Shared/_Layout.cshtml file add code that displays the Logout button when the user is authenticated and the Login button if not. In the AccountController buttons are linked to the Logout and Login actions, as following:
  <!-- Views/Shared/_Layout.cshtml -->
<div class="navbar-collapse collapse d-sm-inline-flex flex-sm-row-reverse">
  <ul class="nav navbar-nav">
    <li>
      <a asp-area="" asp-controller="Home" asp-action="Index"> Home </a>
    </li>
  </ul>

  <ul class="nav navbar-nav navbar-right">
    @if (User.Identity.IsAuthenticated) {
    <li>
      <a id="qsLogoutBtn" asp-controller="Account" asp-action="Logout">
        Logout
      </a>
    </li>
    } else {
    <li>
      <a id="qsLoginBtn" asp-controller="Account" asp-action="Login"> Login </a>
    </li>
    }
  </ul>
</div>
About the login flow
The user clicks on the Log In button and is directed to the Login route.
The ChallengeAsync tells the ASP.NET authentication middleware to issue a challenge to the authentication handler registered with the Porta authenticationScheme parameter. The parameter uses the "Porta" value you passed in the call to AddOpenIdConnect in the Startup class.
The OIDC handler redirects the user to the Porta /authorize endpoint, which displays the Login view. The user can log in with their username and password, social provider or any other identity provider.
Once the user has logged in, Porta calls back to the /callback endpoint in your application and passes along an authorization code.
The OIDC handler intercepts requests made to the /callback path.
The handler looks for the authorization code, which Porta sent in the query string.
The OIDC handler calls the /oauth/token endpoint to exchange the authorization code for the user's ID and Access Tokens.
The OIDC middleware extracts the user information from the claims on the ID Token.
The OIDC middleware returns a successful authentication response and a cookie which indicates that the user is authenticated. The cookie contains claims with the user's information. The cookie is stored, so that the cookie middleware will automatically authenticate the user on any future requests. The OIDC middleware receives no more requests, unless it is explicitly challenged.
