API Resources

Setting up an API Resource for your application.
This might be e.g. a physical or logical API. In turn each API can potentially have scopes as well. Some scopes might be exclusive to that resource, and some scopes might be shared.
When the API surface gets larger, a flat list of scopes might not be feasible. You typically need to introduce some sort of namespace to organize the scope names, and maybe you also want to group them together and get some higher-level constructs like an audience claim in access tokens. You might also have scenarios, where multiple resources should support the same scope names, whereas sometimes you explicitly want to isolate a scope to a certain resource.
This section of the documentation provides information on creating and managing API Resources.
Using the API resource grouping gives you the following additional features:
Support for the JWT aud claim. The value(s) of the audience claim will be the name of the API resource(s)
Support for adding common user claims across all contained scopes
Support for introspection by assigning an API secret to the resource
Support for configuring the access token signing algorithm for the resource
The ultimate job of an OpenID Connect/OAuth token service is to control access to resources.
The two fundamental resource types include:
API Resources which represent functionality a client wants to access. Typically, they are HTTP-based endpoints (aka APIs), but could also be message queuing endpoints or similar. and,
Identity Resources which represent claims about a user like user ID, display name, email address etc.
Creating a new API Resource
This might be for instance a physical or logical API. In turn each API can potentially have scopes as well. Some scopes might be exclusive to that resource, and some scopes might be shared.
When the API surface gets larger, a flat list of scopes might not be feasible. You typically need to introduce some sort of namespace to organize the scope names, and maybe you also want to group them together and get some higher-level constructs like an audience claim in access tokens. You might also have scenarios, where multiple resources should support the same scope names, whereas sometimes you explicitly want to isolate a scope to a certain resource.
This section of the documentation provides information on creating and managing API Resources.
Above the API Resources Table, one can create a New API Resource.
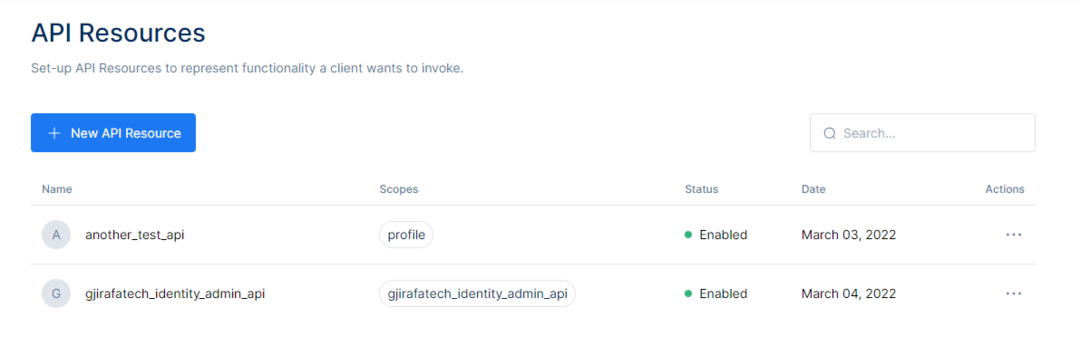
On the right side of the button is the Search bar, used to search for the available API Resources.
After clicking the New API Resource button, the page will be redirected to the API Resource Information page. There will be the option to Name the API Resource and input other information regarding the API Resource.
On the Name field, give the API Resource a unique name. This would be that value used for authentication with introspection and will be added to the audience of the outgoing access token.
Then, input a Display Name, which would be the value that can be used on the screen, for example, on the consent screen.
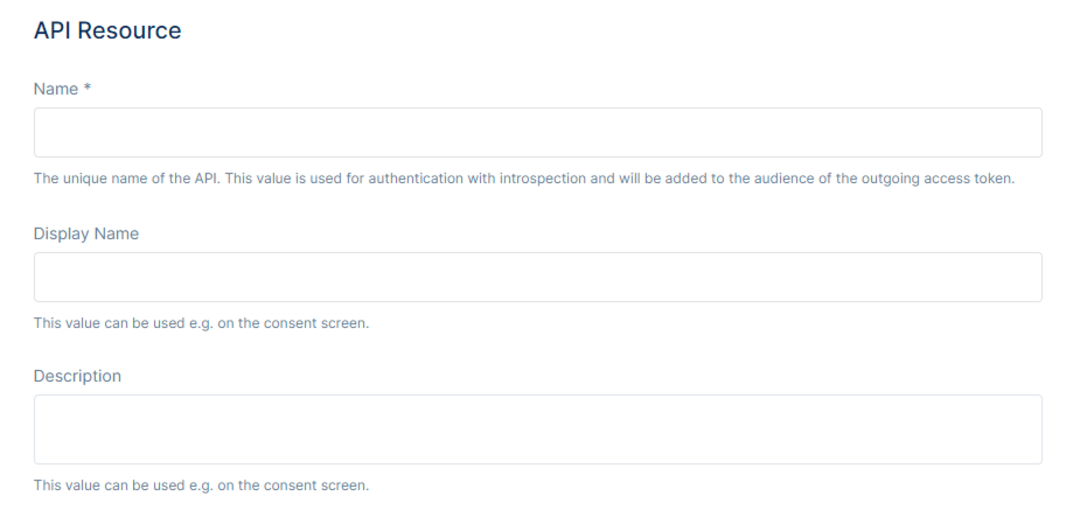
After setting the Display Name, there will be a text field for the description of the API Resource. You can set a Description about the API Resource, which could also be used in the consent screen.Show In Discovery Document allows specifying whether this scope is shown in the discovery document. The default value is set to true. The discovery endpoint can be used to retrieve metadata about token service - it returns information like the issuer name, key material, supported scopes etc. The discovery endpoint is available via “TokenServiceUrl”/.well-known/openid-configuration.
Enabled specifies if this resource is enabled and can be requested. The default value is set to true.
Finally one must decide upon the Allowed Access Token Signing Algorithms. Porta needs an asymmetric key pair to sign and validate JWTs. This key material can be either packaged as a certificate or just raw keys. Both RSA and ECDSA keys are supported and the supported signing algorithms include RS256, RS384, RS512, PS256, PS384, PS512, ES256, ES384 and ES512.
You can use multiple signing keys simultaneously, but only one signing key per algorithm is supported. The first signing key you register is considered the default signing key.

Now choose the User Claims types included in the access token. The selected user claims will be included in the access token. They are selected based on the client 's needs to have them and display them on their platforms in different ways. Clients may have different claims selected to be included in their access token.
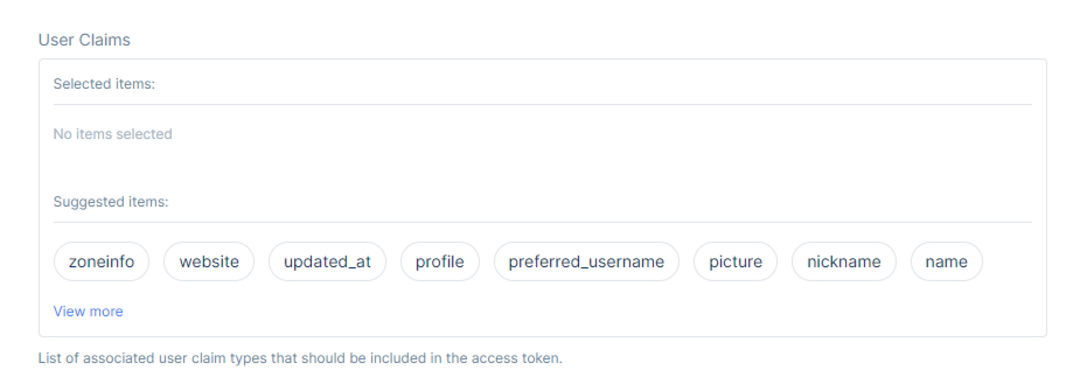
Choose any of the associated user claim types of choice just by clicking over one of them.
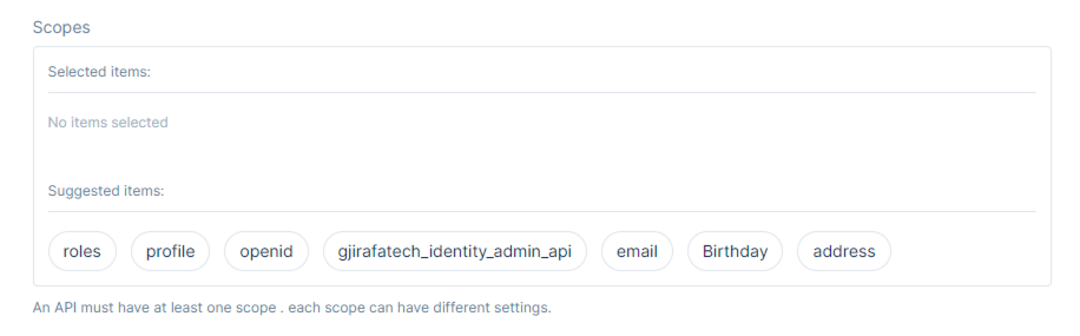
You can also choose the Scopes to include in the API Resource. An API must have at least one scope. Each scope can have different settings.
You can choose any of the default scopes or the scopes that were created from the Administrator in the API Scopes section.
Once done with the API Resource Information, click the Save button to save the changes.
Editing an API Resource
To Edit the API Resource created, click the three dots in the right of the API Resource in the API Resource Table or click the API Resource Name.
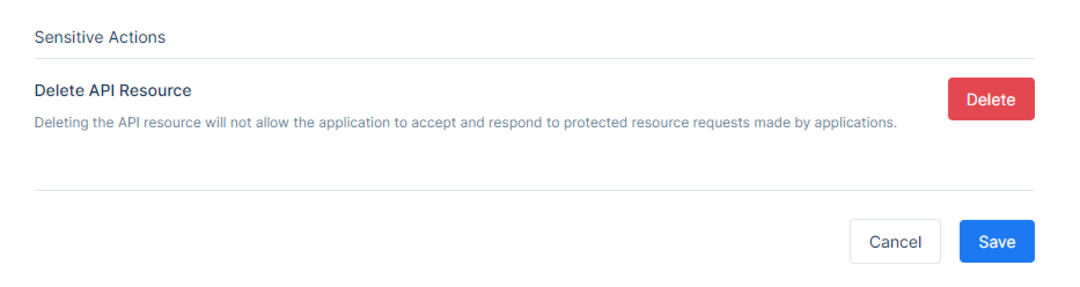
To Delete the API Resource, click in the same place and click Delete.
After clicking the Edit option, it will redirect the page to the API Resource Information page, the same as when created in the API Resource. On top of that, there will be the options to Manage API Secrets and Manage API Resource Properties.
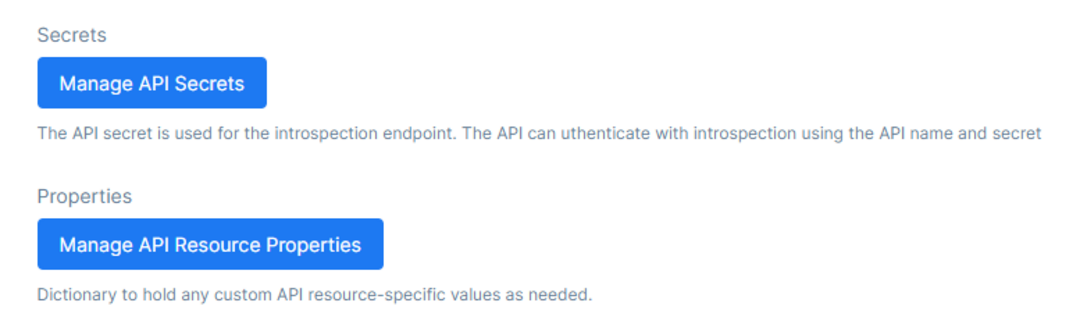
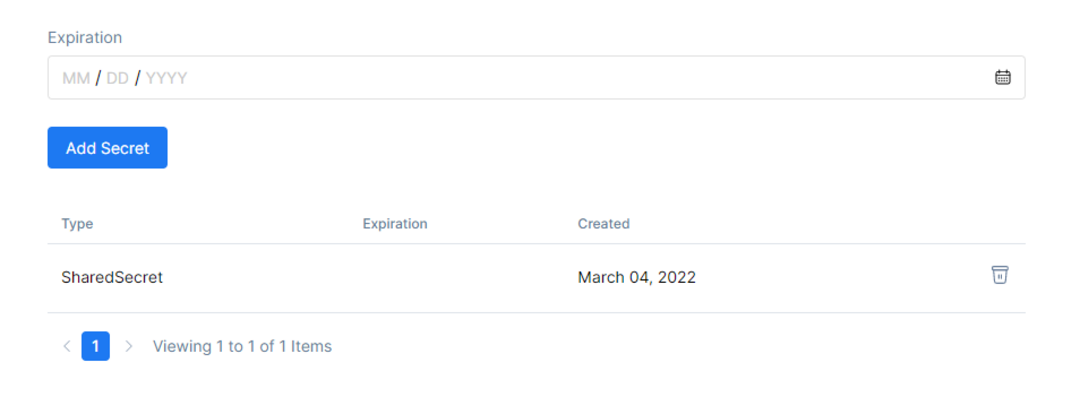
After clicking the Manage API Secrets, the page will be directed to the API Resource Secrets page. There will be the option to pick the Secret Type, Secret Value, Hash Type, Expiration Date.
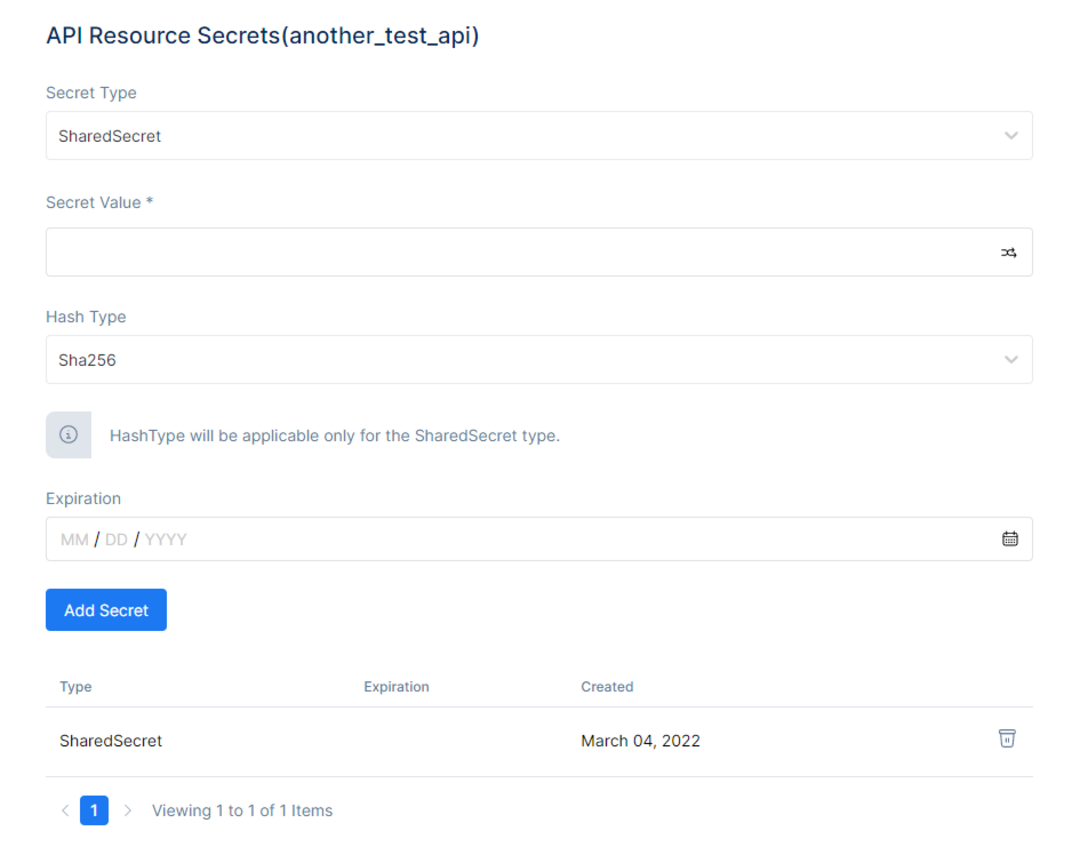
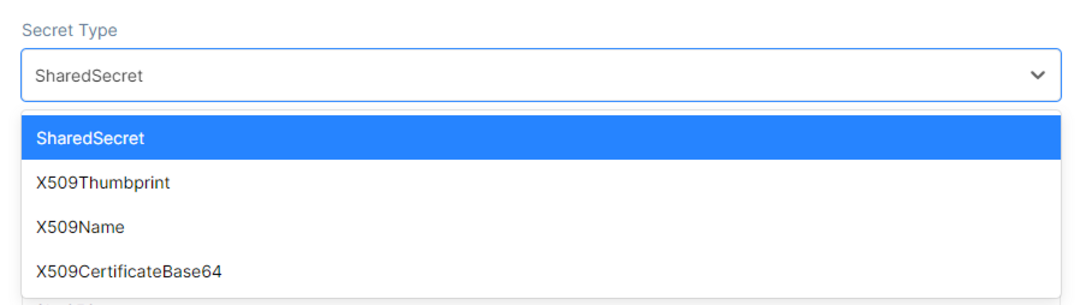
They have a similar use with client secrets and are used when a client wants to have two or many API resources but only one of them must contain a secret. For that purpose you can assign a list of secrets to an API resource. Secret parsing and validation is an extensibility point in IdentityServer. Out of the box it supports shared secrets as well as transmitting the shared secret via a basic authentication header or the POST body.After clicking the Secret Type drop list, a variety of options will appear to choose from:
Then input the Secret Value in the Secret Value Field.

The arrows in the right of the field will generate a random Secret Value.
After that, you can pick a Hash Type from the drop-down menu, such as these:

And in the end, choose an Expiration Date. After the configuration, click the Add Secret button, and the secret will be added to the Secret Table.
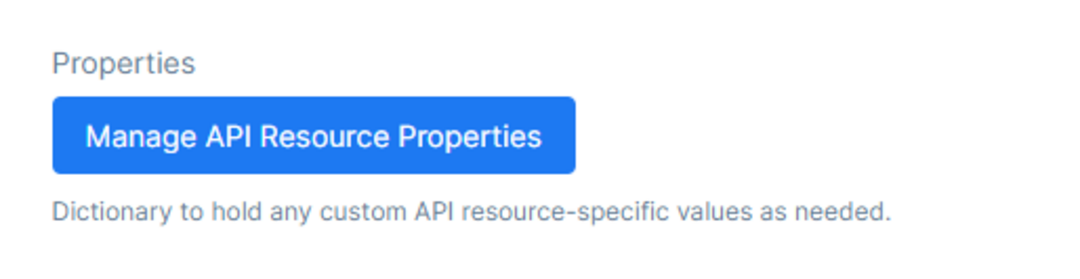
To Manage API Resource Properties navigate to the Manage API Resource Properties.
The page will be directed to API Resource Properties for that specific API Resource chosen. Here, set a Key and a Value to add them as properties.
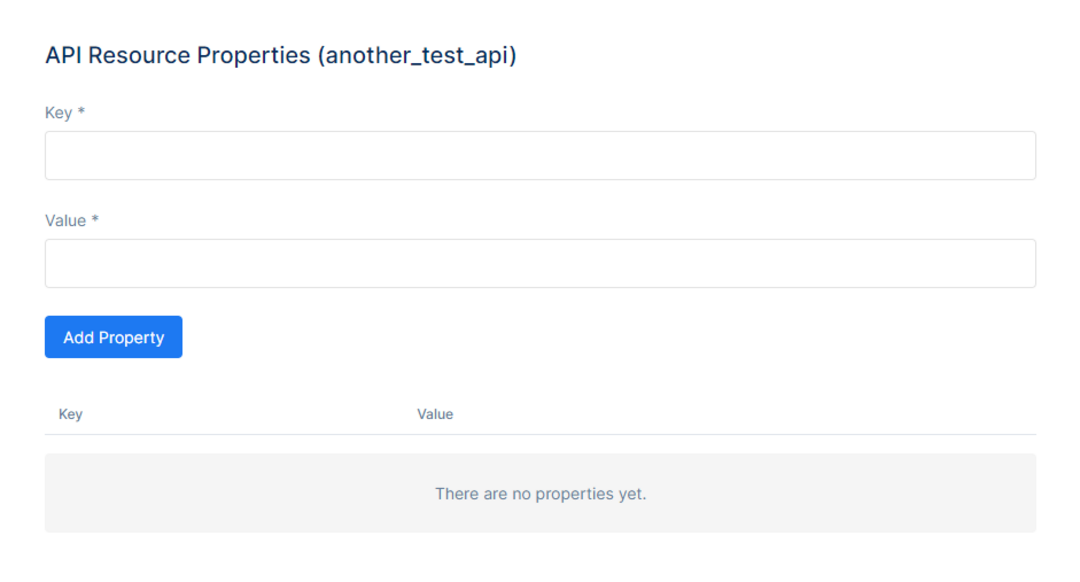
After setting the Key and Value properties, click the Add Property button to add them to the Properties Table.

Once done with managing the secrets and the properties, go back to the main Edit Page.There will be the Sensitive Actions Section, where is given the option to delete a specific API Resource. Keep in mind that this action cannot be undone.
Deleting the API Resource will not allow the application to accept and respond to protected resource requests made by applications.