User Management

Manage users settings.
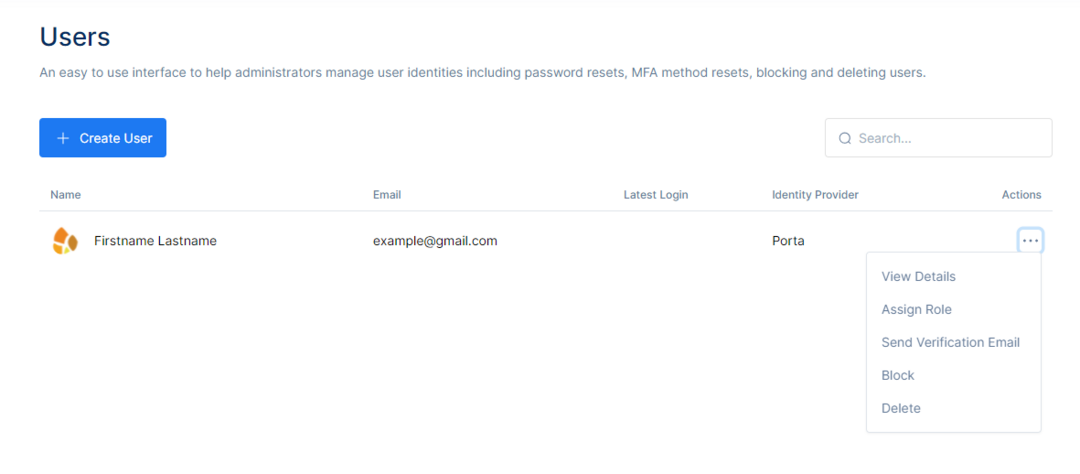
In User Management, one can administer users and their roles. First, go to the Users section to see the current users in the Users Table. The list contains all the registered users to the applications you have added in the Porta dashboard and configured to communicate with Porta. The list contains basic information on the user’s First and Last Name, Email address, latest login and Identity Provider.

Create users by clicking the Create User button or search for specific users in the top right Search bar.
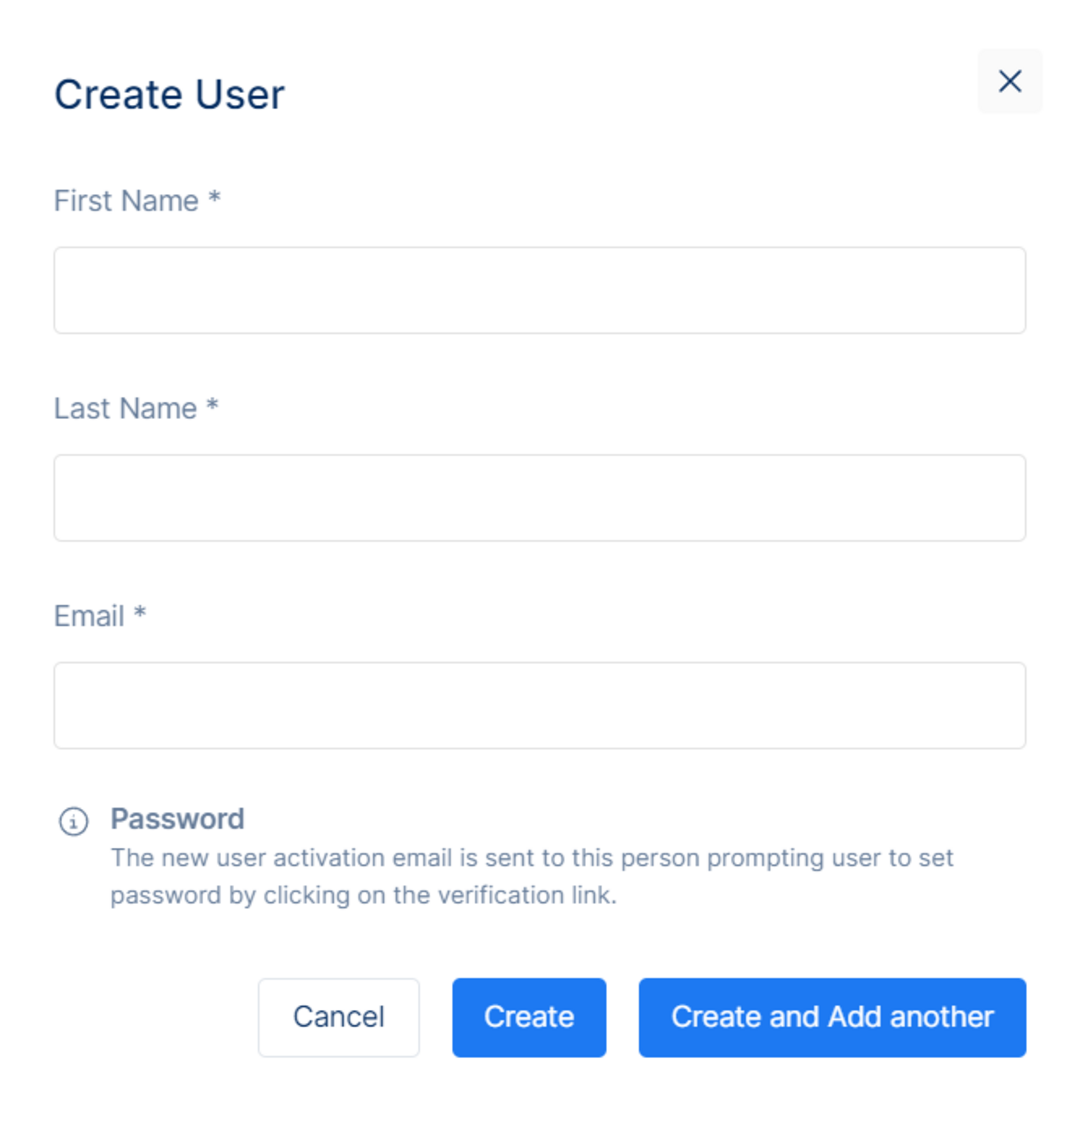
To Create a User, click the button, and a new pop-up window will open up.
The required input fields include user’s First Name, Last Name, and Email whereas the Username is optional. After filling the fields with the required information, click Create to create the user or click Create and Add another, so the Create User window will stay open after clicking the button to add another user of choice. This action will send an email to the user inviting them to set a password for their newly created account. Please note that the user will not be able to login or access their account until they have completed this step.
The created user will show up on our User Table. Information on the latest login will not be available as the user has just been created by a member in the Porta dashboard. That information becomes available as the user logs in for the first time with their newly created account.
The more option allows one to View Details to see the details for that specific user, Assign Role to assign a particular role for that user, Send Verification Email to send a verification direct link to that user, Block to block that user and Delete to delete that user. These functions and their purpose is described below in further detail.
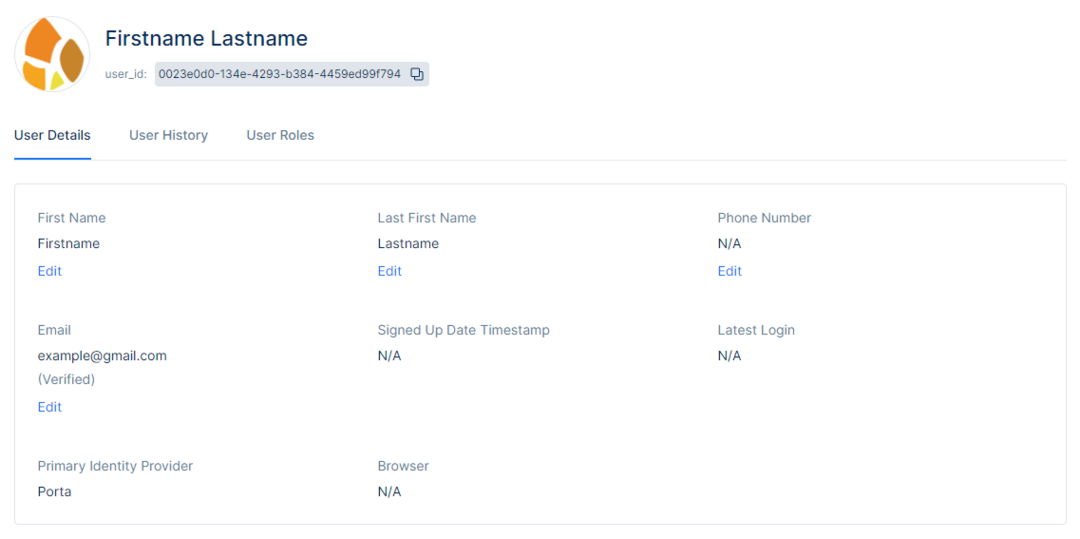
Under User Details, one is able to view a variety of information on your users that is accessible to you. This information is available to you via a user profile and contains data on the user's First Name, Last Name, Phone Number, and Email among others.
Below the User Details section, one will find User Authentication Settings that allow one to perform certain customer service.
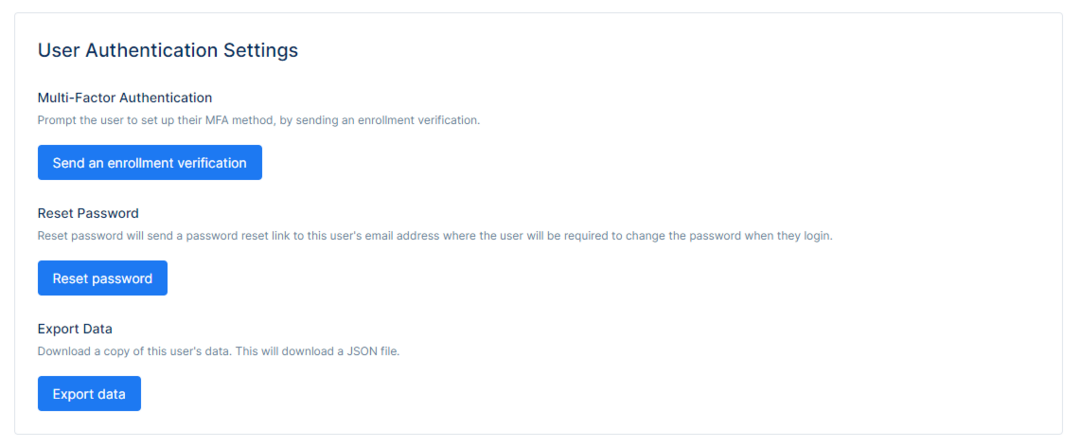
Sending an Enrollment Verification will send an email to the user inviting them to enroll in multi-factor authentication. The email contains a link redirecting the user to their user profile where they can set up one of the available methods of multi-factor authentication. When this function is used, one can also view when this action was last taken in the dashboard.
Please note that the user is not required to set up multi-factor authentication and can simply choose to ignore the request.
Sending a Reset Password prompt will send an email to the user inviting them to reset their password. The email contains a link redirecting the user to the Reset Password page where they will be able to change their password. This can be typically used upon requests by users to reset their password. Please note that you are not able to change the password for the user and this action must be taken by the user. This is done to ensure that no exchange of passwords occurs via channels where they can be intercepted, thereby ensuring security.
The Export Data option will allow one to download a copy of that user’s data that is available. The file downloaded is a JSON file format. Please note that the data here includes only those data that the user has provided when interacting with their user profile in Porta. Data from external services is not available.
The Sensitive Actions section provides the options to Block or Delete a specific user.
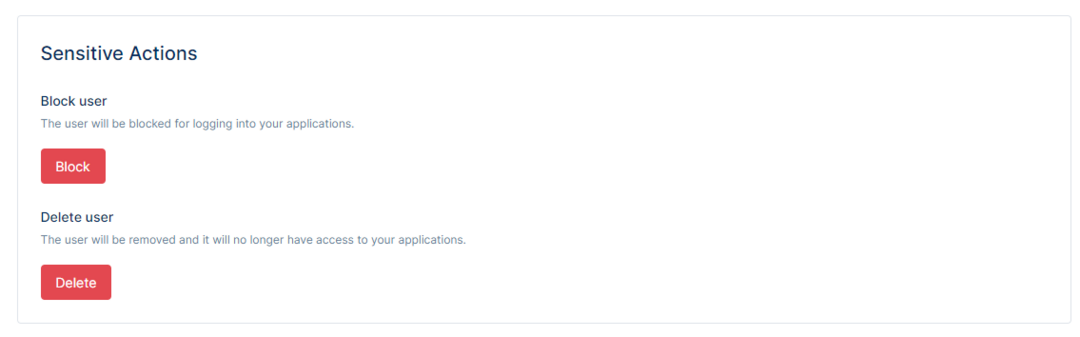
Blocking and Unblocking Users
Blocking a user will prevent that user from logging into your applications. Blocking users does not expire and you will be required to unblock the user to allow the user to have access to your applications again.
Deleting Users
Deleting a user will remove the user permanently, and the user will no longer have access to your applications. A pop-up will warn that this action cannot be undone and prompt a confirmation that you want to delete the user. Upon execution this user is permanently deleted along with all their data in Porta.
User History
The User History section contains logs for you to view identity related operations to that account.


The event will show the event that was part of that log. Date Timestamp will show the date when it happened, Application will show in which client it happened, From will show where that log came from, and Details show the details in a pop-up window regarding that specific log.
There are many types of audit logs (events)that are recorded each time a regular user or an administrator takes an action.
Below are a few examples of events with a description:
UserLoginSuccessEvent - Denotes a successful user login attempt either by entering their credentials or using one of the available social login options.
UserLoginFailureEvent - Denotes an unsuccessful user login attempt.
UserUpdatedEvent - Denotes an event where the user has updated information in their user profile.
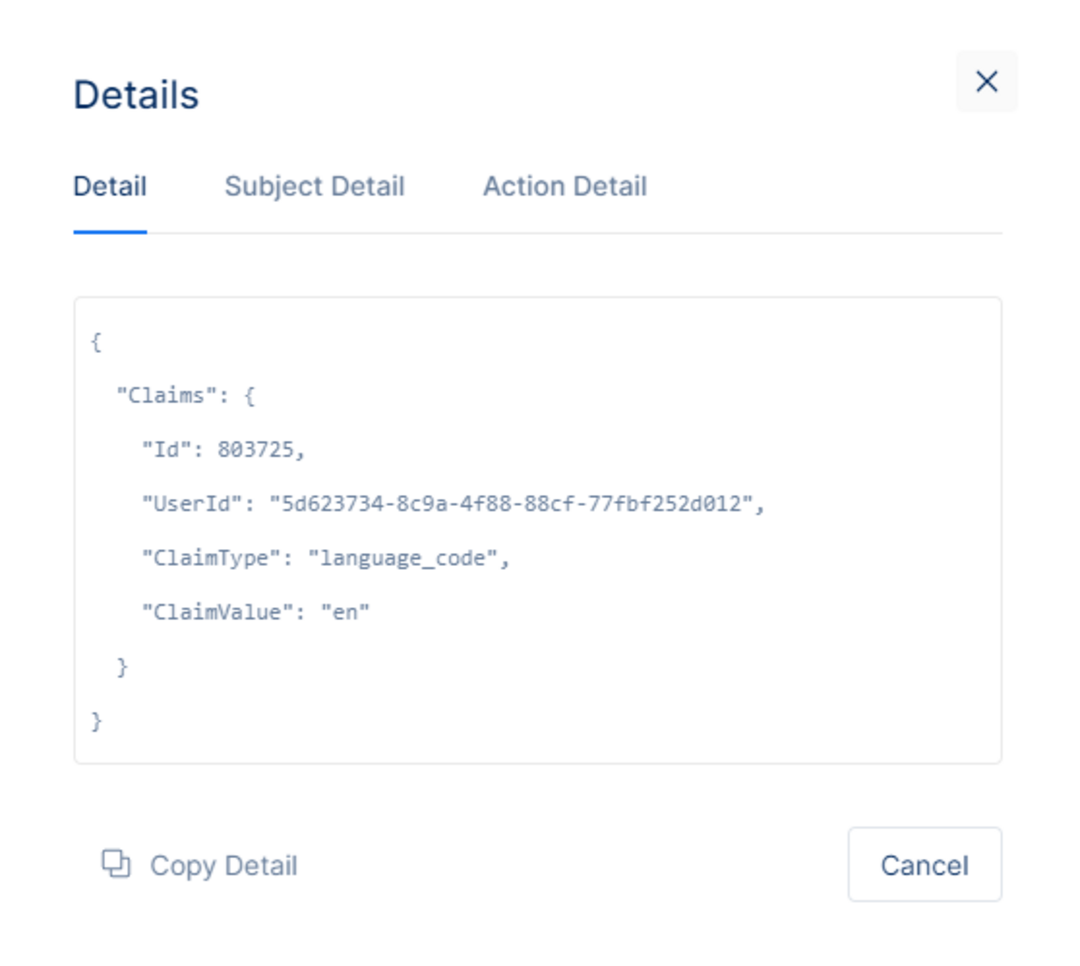
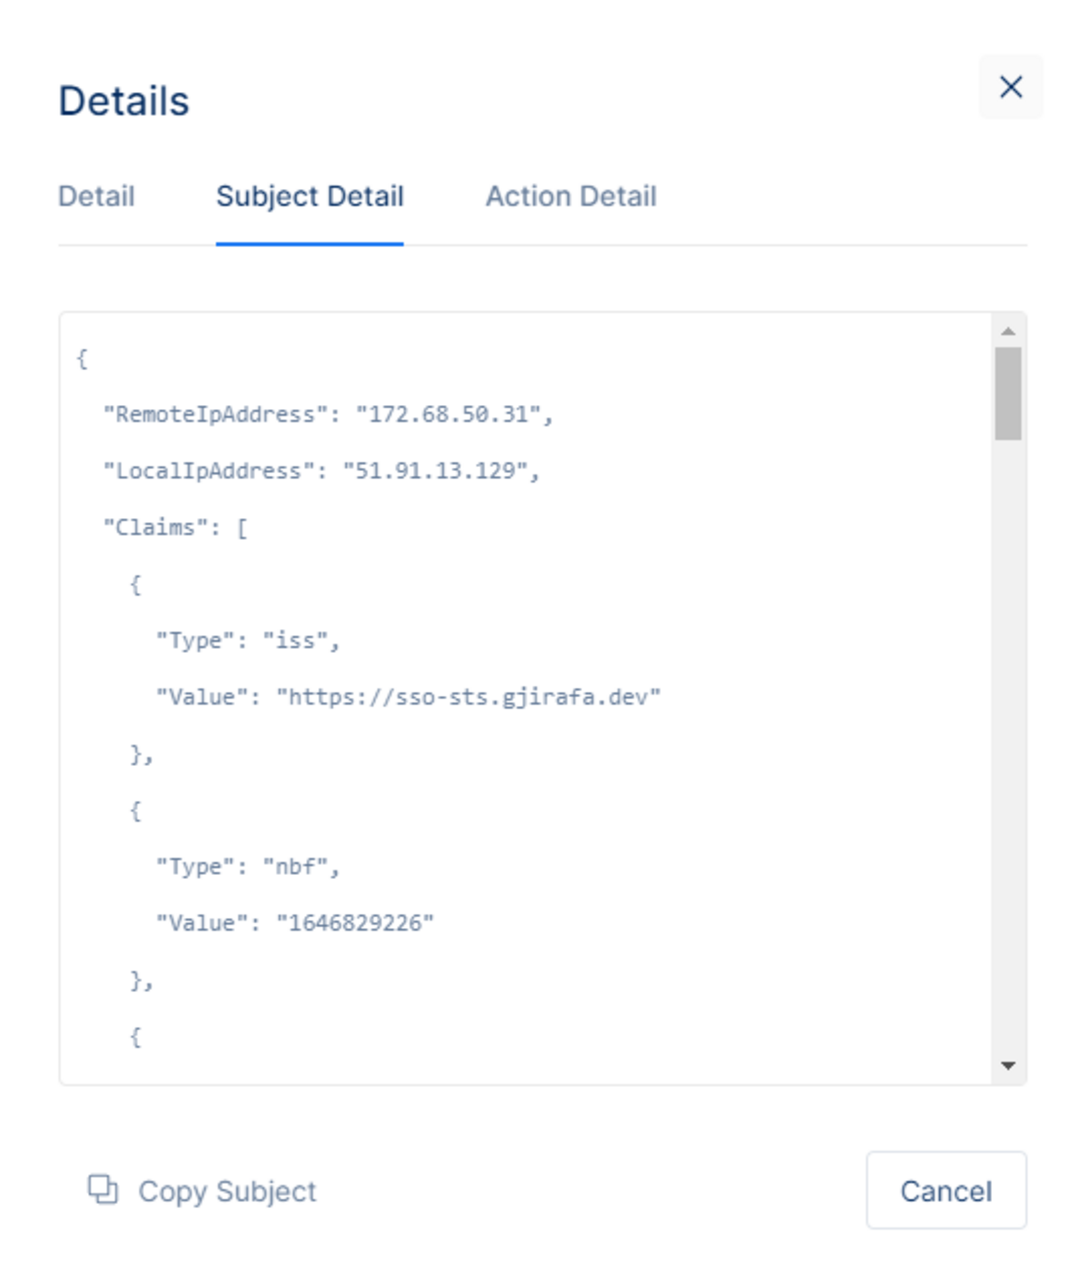
Clicking on the view link will show you details about that particular event. Details will be divided into three parts:
Detail view - will show results about that particular event. E.g UserIdentityClaimsRequestedEvent is an event that will request a user claim.
Subject detail - will show details about log author (IP Address, Claims, etc).
Action Detail - will show details on:
TraceIdentifier: a unique request identifier in case that an error has happened it can be traced back.
RequestUrl: the requested endpoint.
HttpMethod: the HTTP Method called e.g.: POST, PUT, GET etc.

Also check the option to Delete Logs Older Than a specific date of our choice, choose a date, click the Delete Logs Older Than button.
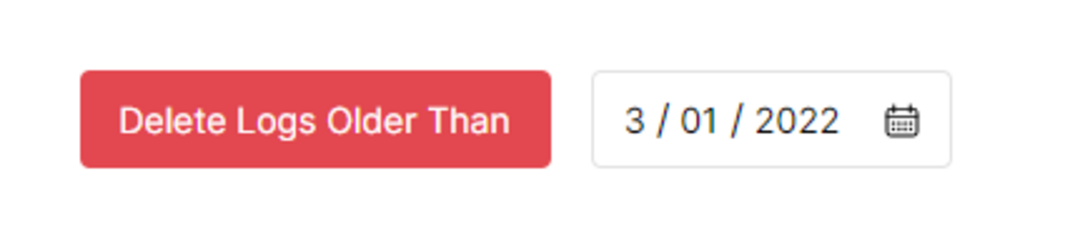
Those particular logs will be deleted. Note that the logs can not be recovered after deletion. Deleting logs is at the discretion of the administrator.
When done with Logs, go to the User Roles section to assign Roles to a specific user of choice. Roles are used to add basic authorization for clients using Porta.
To Assign a Role, click on Assign and a pop-up window will be displayed.
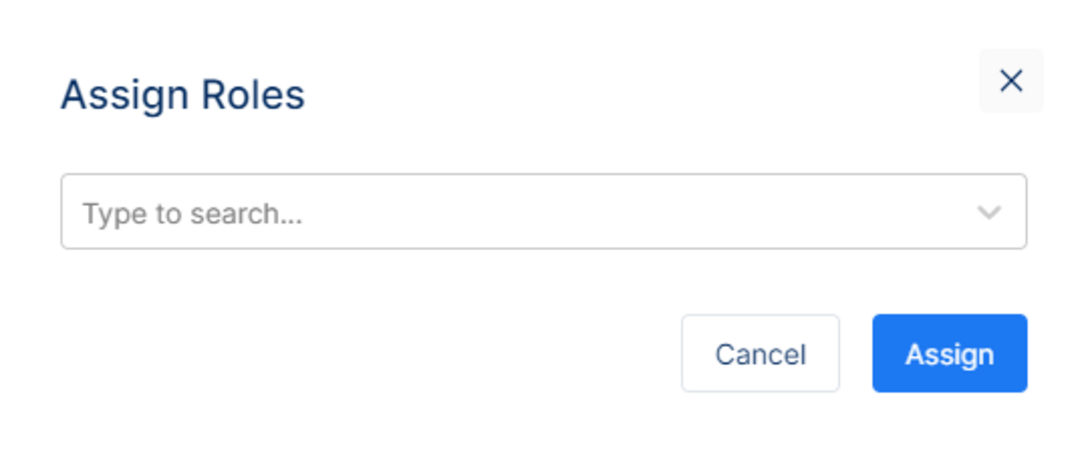
Here, search for a role to assign to a specific user, and once the role is selected, click the Assign button. The role will appear in the Role Table. If no role has previously been created, you will not see any role in the dropdown and you will have to create one first before assigning it to a user.

Devices
Under Devices, the administrator can view all the devices or sessions the user has signed in with. In some cases, the administrator might see sessions instead of individual devices. A session is a period of time during which the user signed in to their Porta Account from a browser, app, or service on a device. It’s normal to have multiple sessions on the same device. A separate session can be created on the device when:
A user signs in on a new device
A user re-enters their password to verify it’s them
A user signs in on a new browser, app, or service
A user grants an app access to their account data
A user signs in on an incognito or private browser window
Under the view, the administrator has the option to ‘Unlink Device’ on behalf of the user. Upon confirmation the user’s access to their account will be removed from the device.
Authorized Applications
Under Authorized Applications, the administrator is able to view on which applications the user has authorized access including the name of the application, date when the access was first initiated, expiration, the identity grants user gave permission to the application. In addition, an administrator is able to ‘Revoke Access’ to each application whereby the user will be signed out from the application.
Consents
Under User Consents, the administrator is able to view the date when the user gave their consent to the Terms and Conditions, and the Privacy Policy as set under ‘Settings’ in the Porta Admin, along with information on the IP Address and Browser Agent. Please note that when a user registers via any of the social providers, the Consents tab will indicate that there are no logs available. This is because the consent to creating an account is handled on the social providers' end.